Quick RV Tuna Melt Sandwich Skillet Recipe: Classic Campfire Comfort Food
This quick RV tuna melt sandwich skillet recipe transforms simple pantry staples into a warm, gooey, and smoky campfire classic in about 10 minutes. Flaky tuna, melty cheese, and crispy bread come together with that irresistible char from the grill—creating the ultimate comfort food for boondocking adventures. It’s the perfect answer to those days when you want something fast, familiar, and satisfying.
Whether you’re using a charcoal grill for that authentic smoky flavor or a gas grill for quick, consistent heat, this beginner-friendly recipe is practically foolproof. One skillet, minimal ingredients, and no complicated techniques—it’s the ultimate RV lunch or light dinner that everyone will love. Let’s fire up the grill and make the best tuna melt you’ll ever taste at camp!
Recipe Summary
Prep Time: 5 mins
Cook Time: 5 mins
Total Time: 10 mins
Servings: 4
Difficulty: Easy
Ingredients
- 2 cans (5 oz each) tuna in water, well drained
- 8 slices bread (your choice—sourdough, whole wheat, or white)
- 4 slices cheddar or American cheese (or any melting cheese)
- ¼ cup mayonnaise
- 1 tbsp Dijon mustard (optional, for tang)
- 1 small celery stalk, finely diced (optional)
- 1 small red onion, finely diced (or 1 tbsp dried minced onion)
- 1 tsp smoked paprika (for smoky flavor)
- ½ tsp garlic powder
- Salt and pepper to taste
- 2 tbsp butter or olive oil (for grilling)
- For serving: pickles, chips, or a simple green salad
How to Grill Tuna Melt Sandwiches (Step-by-Step)
- Preheat your grill to medium heat (about 350-375°F). For charcoal grills, arrange coals for even direct heat. For gas grills, preheat with the lid closed for 5 minutes.
- Prepare the tuna filling – in a medium bowl, combine drained tuna, mayonnaise, mustard (if using), celery, onion, smoked paprika, garlic powder, salt, and pepper. Mix until well combined.
- Assemble the sandwiches – divide the tuna mixture evenly among 4 slices of bread. Top each with a slice of cheese. Place the remaining 4 slices of bread on top to close the sandwiches.
- Butter the outside – spread butter or brush olive oil on the outside of each sandwich (this gives them a golden, crispy crust).
- Heat a cast iron skillet directly on the grill grates. Add the sandwiches to the skillet (work in batches if needed).
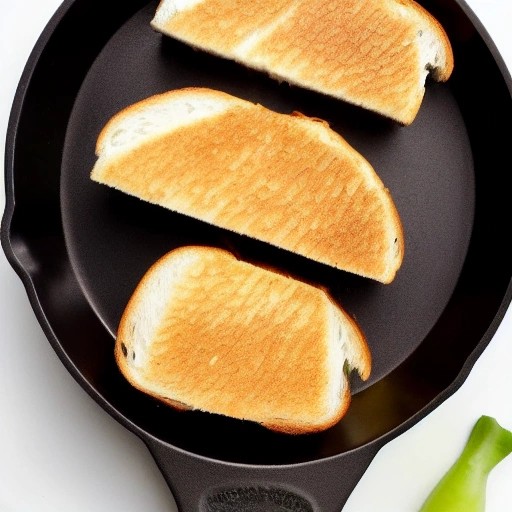
- Grill the sandwiches – cook for 2-3 minutes per side, pressing down gently with a spatula, until the bread is golden brown and crispy, and the cheese is melted.
- Serve hot – remove from the skillet, cut in half if desired, and serve immediately with pickles, chips, or a side salad.
Pro Tips for the Perfect Tuna Melt
- Get that smoky char – the cast iron skillet on the grill creates a beautiful golden crust. For extra smoky flavor, use smoked paprika in the tuna mixture.
- Drain the tuna well – squeeze out as much liquid as possible. This prevents soggy sandwiches and keeps the filling perfectly textured.
- Use a lid or foil tent – if the cheese isn’t melting quickly, cover the skillet with a lid or aluminum foil for the last minute. This traps heat and melts the cheese perfectly.
- Don’t overcrowd the skillet – cook the sandwiches in batches if needed. Overcrowding makes it harder to get that crispy, golden crust.
- Press gently – use a spatula to press down on the sandwiches while cooking. This helps them crisp evenly and melt the cheese faster.
Delicious Variations to Try
- Spicy Tuna Melt – add ½ teaspoon red pepper flakes, diced jalapeños, and a drizzle of sriracha to the tuna mixture. Use pepper jack cheese for extra heat.
- Mediterranean Tuna Melt – add chopped kalamata olives, sun-dried tomatoes, and fresh oregano. Top with provolone or feta cheese.
- Bacon Tuna Melt – add 4 slices of cooked, crumbled bacon to the tuna mixture. Use cheddar cheese and add a slice of tomato.
- Open-Faced Tuna Melt – toast the bread on one side only, then pile the tuna mixture on top, add cheese, and finish under a foil tent until bubbly.
- Avocado Tuna Melt – add mashed avocado to the tuna mixture for extra creaminess. Top with monterey jack cheese and fresh cilantro.
Storing Leftovers
Storage: Tuna melts are best enjoyed fresh, but you can store leftover sandwiches in the refrigerator for up to 2 days. Keep them wrapped in foil or in an airtight container.
Reheating: The best way to reheat is in a cast iron skillet over medium heat on your grill or camp stove. Add a little butter to the pan and crisp each side for 1-2 minutes until warm. You can also use a toaster oven, but avoid microwaving—it makes the bread soggy.
Pro tip: Make the tuna filling ahead of time at home. Store it in a small container, then just assemble and grill at camp for a super-fast meal!
Frequently Asked Questions (FAQ)
- Can I make these tuna melts without a grill?
Absolutely! This recipe works perfectly on any camp stove, portable burner, or your RV stovetop. The grill adds smoky flavor, but a skillet on any heat source works great. Just follow the same steps over medium heat. - What’s the best bread for tuna melts?
Sourdough, rye, or any sturdy bread works best. They hold up well to the filling and get perfectly crispy. Avoid soft, thin breads that may fall apart. - Can I use canned chicken instead of tuna?
Yes! Canned chicken makes a great substitute. Follow the same recipe and instructions for a delicious chicken melt. - How do I keep the bread from burning?
Keep the heat at medium (not high) and watch the sandwiches closely. Butter or oil helps them crisp without burning. Pressing down gently helps them cook evenly. - What can I serve with tuna melts?
Classic sides include pickles, potato chips, coleslaw, or a simple green salad. For a hearty meal, pair with tomato soup!
This quick RV tuna melt sandwich skillet recipe proves that classic comfort food can be elevated by the magic of campfire cooking. With your trusty grill, a cast iron skillet, and a few simple ingredients, you can create warm, gooey, smoky sandwiches that bring back fond memories and create new ones. Fire up the grill and enjoy the best tuna melt you’ll ever make under the open sky!