Easy 10 Minute RV Tuna Salad Sandwiches: A Smoky, Fresh, No-Cook Campground Classic
Some of the best camping meals are the ones that don’t require firing up the stove or grill. This Easy 10 Minute RV Tuna Salad Sandwiches recipe is the ultimate no-cook solution for hot days, quick lunches, or lazy evenings when you want something delicious without any heat or fuss.
Perfect for using up pantry staples and fresh ingredients from your RV fridge, these sandwiches are creamy, flavorful, and come together in just 10 minutes. Plus, they’re incredibly versatile—you can add leftover grilled chicken or even a dash of liquid smoke to give them that BBQ recipe flair without turning on the grill.
1. Introduction
This Easy 10 Minute RV Tuna Salad Sandwiches recipe is the ultimate no-cook camping meal, combining creamy, flavorful tuna salad with fresh, crunchy vegetables and your favorite bread, all ready in just 10 minutes. It’s the perfect solution for hot summer days when you don’t want to heat up your RV kitchen.
The beauty of this recipe is its simplicity and versatility. While it’s a classic no-cook dish, you can easily elevate it by adding leftover grilled chicken or a sprinkle of smoked paprika for that smoky flavor we all love. Served on fresh bread or wrapped in a tortilla, it’s a meal that keeps you fueled for adventure without weighing you down.
2. Recipe Card
Recipe Summary
Prep Time: 10 mins
Cook Time: 0 mins
Total Time: 10 mins
Servings: 4
Difficulty: Easy
Ingredients
- 2 cans (5 oz each) tuna in water, drained
- 1/2 cup mayonnaise or Greek yogurt
- 1 celery stalk, finely diced
- 1/4 red onion, finely diced
- 2 tablespoons fresh parsley or dill, chopped
- 1 tablespoon lemon juice
- Salt and black pepper to taste
- 8 slices of your favorite bread (or 4 tortillas or croissants)
- Optional Add-ins:
- 1/2 cup leftover grilled chicken, finely diced
- 1/4 teaspoon smoked paprika or liquid smoke
- 1/4 cup shredded cheese
- Lettuce, tomato slices, or avocado for serving
Note: For a smoky twist without the grill, add 1/4 teaspoon of smoked paprika to the tuna salad. If you have leftover grilled chicken from your gas grill or charcoal grill, dice it finely and mix it in for extra flavor and protein.
3. Instructions (Step-by-step)
Step 1: Drain the Tuna
Open the cans of tuna and drain the liquid thoroughly. Use a fork to flake the tuna into a medium mixing bowl.
Step 2: Add the Vegetables
Add the finely diced celery, red onion, and fresh herbs to the bowl with the tuna. These add crunch and freshness to the salad.
Step 3: Add the Dressing
Add the mayonnaise (or Greek yogurt), lemon juice, salt, and pepper. If you’re adding smoked paprika or liquid smoke for a smoky flavor, add it now. Mix everything together until well combined.
Step 4: Add Extra Protein (Optional)
If you’re using leftover grilled chicken, dice it finely and fold it into the tuna salad. This adds extra protein and a subtle smoky flavor from the grill.
Step 5: Taste and Adjust
Taste the tuna salad and adjust the seasoning as needed. Add more lemon juice for brightness, more salt for flavor, or more mayonnaise for creaminess.
Step 6: Assemble the Sandwiches
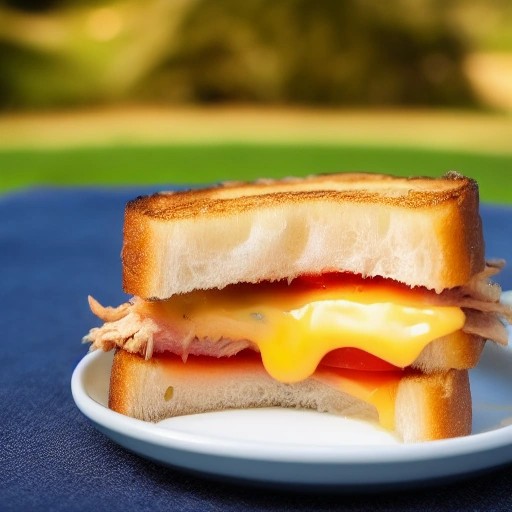
Toast your bread if desired (on your gas grill for extra smoky flavor!). Layer lettuce leaves on the bread, add a generous scoop of tuna salad, top with tomato slices or avocado, and close with the second slice of bread. If using tortillas, wrap them up burrito-style.
Step 7: Serve
Cut the sandwiches in half and serve immediately, or wrap them up for a picnic or hiking lunch.
4. Tips Section
- Avoiding Soggy Sandwiches: To prevent soggy bread, toast the bread lightly or use sturdy bread like sourdough. You can also place a layer of lettuce between the bread and the tuna salad to create a moisture barrier.
- Grill the Bread: For an extra smoky flavor, toast your bread directly on your gas grill or charcoal grill for 1-2 minutes per side. This adds a delicious char that complements the tuna salad perfectly.
- Creamy vs. Light: For a lighter version, use Greek yogurt instead of mayonnaise. For extra creaminess, use a combination of both. You can also add a mashed avocado for a creamy, healthy twist.
- Maximizing Fridge Space: Since this recipe uses pantry staples and a few fresh ingredients, it’s perfect for RV cooking. It doesn’t take up much refrigerator space, and the ingredients store well.
- Make-Ahead Tuna Salad: You can make the tuna salad ahead of time and store it in an airtight container in your camper fridge for up to 3 days. This is great for meal planning and quick lunches on busy days.
- Add Smoky Flavor: If you don’t have leftover grilled meat, add a dash of liquid smoke or smoked paprika to the tuna salad. This gives it that BBQ recipe taste without needing to fire up the grill.
5. Variations
- Spicy Version: Add 1 tablespoon of sriracha or chili garlic sauce to the tuna salad. Top with sliced jalapeños and pepper jack cheese.
- BBQ Tuna Salad: Add 2 tablespoons of your favorite BBQ sauce to the tuna salad instead of lemon juice. This creates a sweet and smoky flavor profile.
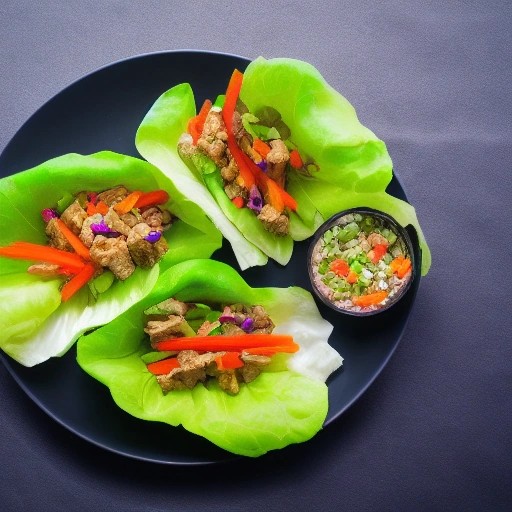
- Healthy Version: Use Greek yogurt instead of mayonnaise. Add extra vegetables like shredded carrots, bell peppers, or cucumber. Serve on whole wheat bread or in lettuce wraps.
- Smoky Version: Add 1/2 teaspoon of smoked paprika or a dash of liquid smoke. Use leftover grilled chicken instead of or in addition to the tuna. Serve on grilled bread for maximum smoky flavor.
- Mediterranean Version: Add chopped kalamata olives, sun-dried tomatoes, and feta cheese. Use lemon juice and olive oil instead of mayonnaise for a lighter dressing.
- Budget-Friendly Version: Stretch your food budget by adding more vegetables like grated carrots or finely chopped bell peppers. This makes the tuna salad go further without adding much cost.
6. Storage Instructions
- How to Store Tuna Salad: Store the tuna salad in an airtight container in your RV fridge for up to 3 days. Keep it away from other strong-smelling foods to prevent flavor transfer.
- Storing Assembled Sandwiches: If you’ve already assembled the sandwiches, wrap them tightly in plastic wrap or foil and store in the fridge for up to 1 day. The bread may get slightly soft, but it will still taste great.
- Storing Ingredients: Keep the bread separate from the filling to prevent sogginess. If you’re prepping for a picnic, pack the tuna salad in a container and bring the bread separately, then assemble when ready to eat.
- Food Safety: Ensure your RV refrigerator is at or below 40°F to keep the tuna salad safe. If you’re boondocking and running a propane fridge, keep an eye on your propane gauge to ensure your fridge stays at the right temperature.
- Freezing Option: Tuna salad doesn’t freeze well because the mayonnaise separates when thawed. It’s best enjoyed fresh.
7. FAQ Section
Q: Can I use fresh tuna instead of canned?
Yes! If you have fresh tuna, you can grill it on your charcoal grill or gas grill until cooked through (about 4-5 minutes per side for a steak), then flake it and use it in the salad. This adds incredible smoky flavor to the dish.
Q: How can I add more smoky flavor without a grill?
Add 1/4 to 1/2 teaspoon of smoked paprika, a dash of liquid smoke, or use smoked salt. You can also use leftover grilled chicken mixed in with the tuna for a double dose of smoky flavor.
Q: What type of bread works best for tuna salad sandwiches?
Sourdough, whole wheat, or rye bread all work great. For a lighter option, use croissants or tortilla wraps. Toasting the bread on your gas grill adds extra flavor.
Q: Can I make this recipe dairy-free?
Yes! Use a dairy-free mayonnaise or mashed avocado instead of Greek yogurt. Skip any cheese toppings. The recipe is very adaptable to dietary needs.
Q: How long can I keep tuna salad in the RV fridge?
Tuna salad will keep for up to 3 days in a properly cooled camper fridge. Make sure it’s in an airtight container and stored at or below 40°F. Always use your senses—if it looks or smells off, throw it out.
Q: Is this recipe good for meal planning on a road trip?
Absolutely! Tuna salad is a fantastic meal prep option. You can make a big batch at the start of your trip and use it for lunches throughout the week. Just make sure you have enough fridge capacity to store it properly.
Q: What are some good side dishes for these sandwiches?
These sandwiches pair well with fresh fruit, vegetable sticks, chips, pickles, or a simple green salad. For a heartier meal, add a side of instant soup or cup noodles.