RV Tex-Mex Chicken Nacho Cheese Skillet – Smoky, Cheesy & One-Pan Easy
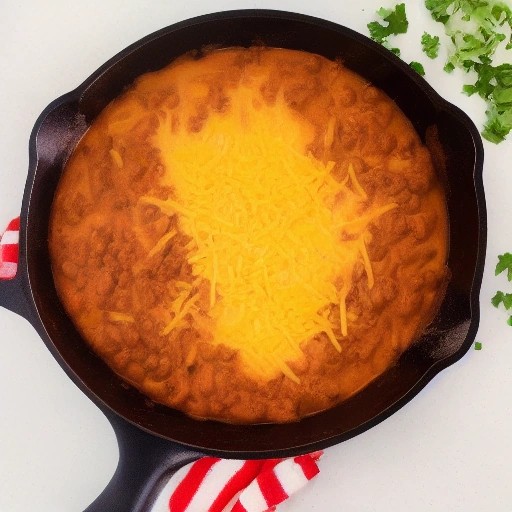
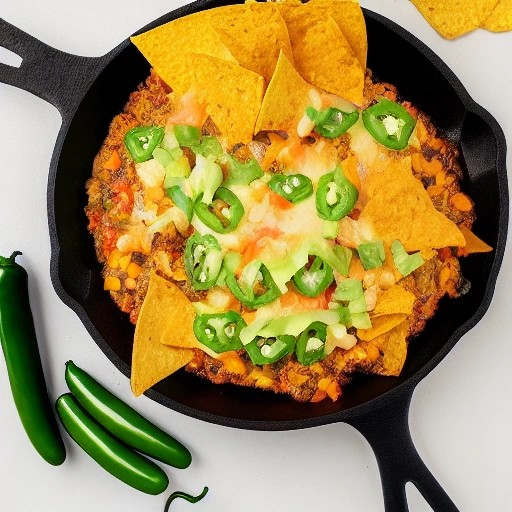
If you’re craving the bold, smoky flavor of grilled chicken nachos but don’t want a sink full of dishes, this RV Tex-Mex chicken nacho cheese skillet is your new campsite favorite. It’s loaded with juicy grilled chicken, crunchy tortilla chips, and a creamy, spicy cheese sauce that comes together in one pan—perfect for motorhome life.
Whether you’re using a gas grill with a side burner or a charcoal grill with a cast-iron skillet, this recipe delivers that irresistible smoky flavor that makes outdoor cooking so special. No complicated steps—just simple ingredients and big, cheesy flavor that feeds a hungry crew.
This one-pan meal is a smart way to use leftover grilled chicken or cook fresh chicken breasts right on the grill. It saves fridge space, keeps food storage simple, and is budget-friendly for any road trip. Let’s fire up the grill and make nacho night unforgettable!
Recipe Summary
Prep Time: 10 mins
Cook Time: 15 mins
Total Time: 25 mins
Servings: 4–6
Difficulty: Easy
Ingredients
- 1½ lb boneless skinless chicken breasts (or leftover grilled chicken, shredded)
- 1 tbsp olive oil
- 2 tbsp taco seasoning (store-bought or homemade)
- 1 medium onion, diced
- 1 (10 oz) can diced tomatoes with green chiles (Rotel)
- 1 (15 oz) can black beans, drained and rinsed
- 1 cup frozen corn kernels
- 2 cups shredded cheddar or Mexican blend cheese
- 1 cup heavy cream or evaporated milk
- 1 (8 oz) bag tortilla chips (thick-cut for dipping)
- Optional toppings: sliced jalapeños, fresh cilantro, sour cream, diced avocado
Step-by-Step Instructions
- Preheat your grill – For a gas grill, set to medium-high heat (about 400°F). For a charcoal grill, arrange hot coals for direct heat and place a cast-iron skillet directly over the fire.
- Grill the chicken – Brush chicken breasts with olive oil and season generously with taco seasoning. Grill for 5–7 minutes per side until internal temperature reaches 165°F. Remove and let rest for 5 minutes, then chop or shred. (If using leftover grilled chicken, skip to step 3.)
- Sauté the aromatics – In a large cast-iron skillet on the grill, add a little oil and sauté diced onion until translucent (about 3–4 minutes).
- Build the cheese sauce – Reduce heat to medium-low. Add the diced tomatoes with green chiles, black beans, corn, and heavy cream. Stir and let simmer for 3–4 minutes.
- Melt the cheese – Gradually add shredded cheese, stirring constantly until smooth and creamy. Season with extra taco seasoning if desired.
- Add the chicken – Fold in the grilled chicken and heat through for 2–3 minutes.
- Serve nacho style – Remove from heat. Arrange tortilla chips on plates or in bowls, top with the cheesy chicken mixture, and garnish with your favorite toppings. Eat immediately!
Grilling Tips & Troubleshooting
- Avoid dry chicken: Don’t overcook—use a meat thermometer. For extra juicy chicken, brine in saltwater for 30 minutes before grilling.
- Perfect grill marks: Clean and oil your grates. Place chicken at a 45° angle, cook 4–5 minutes, then rotate 90° for crosshatch marks.
- Heat zones on a charcoal grill: Set up a two-zone fire—direct heat for searing chicken and indirect heat for simmering the skillet sauce.
- Marinade timing: Marinate chicken in taco seasoning, lime juice, and oil for at least 15 minutes (up to 4 hours) for deeper flavor.
- RV propane usage: This recipe uses about 20 minutes of propane cooking—efficient for saving fuel on longer trips.
- Make it creamier: If the cheese sauce thickens too much, stir in a splash of milk or chicken broth.
Delicious Variations
- Spicy version: Add 2 diced jalapeños, a dash of cayenne, or use spicy taco seasoning. Top with fresh serrano slices.
- BBQ chicken nachos: Swap taco seasoning for BBQ rub, use BBQ sauce instead of tomatoes, and top with pickled red onions.
- Healthy version: Use Greek yogurt instead of heavy cream, reduced-fat cheese, and baked tortilla chips. Add extra veggies like bell peppers and zucchini.
- Smoky chipotle: Stir in 2 chopped chipotle peppers in adobo sauce for deep, smoky flavor that complements the charcoal grill notes.
- Breakfast nacho skillet: Top with fried eggs and serve with salsa verde—perfect for brunch at the campsite.
Storage & Reheating
Store leftovers in an airtight container in the RV fridge for up to 3 days. Keep chips separate to prevent sogginess.
Reheat without drying out: Warm the cheesy chicken mixture on the stovetop over low heat with a splash of milk or broth. Reheat chips in a toaster oven or over the grill for crispiness.
RV fridge organization: Use stackable containers to maximize fridge capacity—this dish stores flat and takes up minimal fridge space.
Frequently Asked Questions
Can I make this on a gas grill without a side burner?
Yes! Place your cast-iron skillet directly on the grill grate over medium heat. Cover the grill to trap heat—it works like an oven. Great for campervan cooking.
How do I get smoky flavor without a smoker?
Add a handful of soaked hickory or mesquite wood chips to your charcoal grill or use a smoker box on a gas grill. Place the skillet on the cooler side, close the lid, and let it absorb that BBQ recipe aroma for 5–10 minutes.
Can I use leftover grilled chicken?
Absolutely! This is a perfect way to use up extra grilled chicken from a previous meal. Just skip the grilling step and add it during the last few minutes to warm through.
What’s the best cheese for nacho sauce?
A blend of cheddar and Monterey Jack melts smoothly. For extra creaminess, add a little Velveeta or cream cheese—it prevents the sauce from breaking.
How does this fit my food budget for camping?
This recipe costs about $3–$4 per serving using pantry staples. It’s a filling, crowd-pleasing dinner that reduces food expenses and minimizes food waste—perfect for budget meals on the road.
One skillet, endless flavor—this RV Tex-Mex chicken nacho cheese skillet is built for campfire cravings and easy cleanups. Fire up the grill, gather your crew, and dig into smoky, cheesy goodness under the open sky. Happy camping and happy eating!