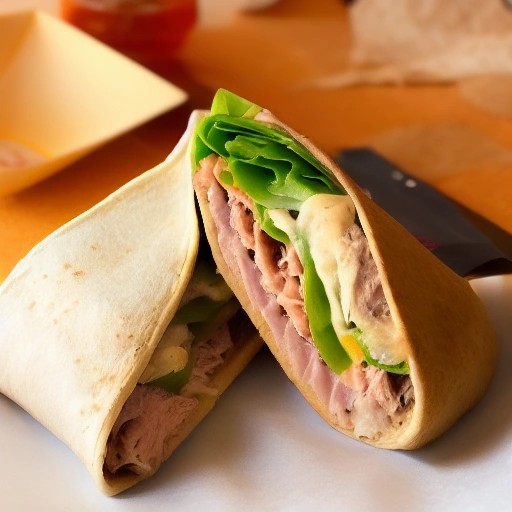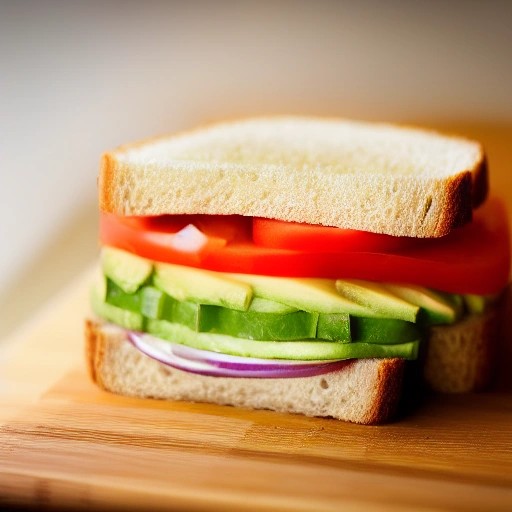
Easy RV Veggie Sandwich: The Ultimate Roadside Lunch Idea
Imagine a cool, crisp, and colorful sandwich loaded with fresh vegetables and a creamy, flavorful spread—all made in minutes and ready to enjoy at a scenic overlook, a roadside picnic table, or right from your campsite cooler. This Easy RV Veggie Sandwich is the perfect no-cook lunch for life on the road. It’s light, satisfying, and packed with nutrients, making it the ideal meal for hot days, long drives, or anytime you want a fresh, delicious bite without the fuss of cooking.
This recipe is a lifesaver for RV cooking and camp meals. Sandwiches are the ultimate no-cook lunch—they travel well in your RV fridge or cooler space, require zero reheating, and come together in minutes. Plus, they’re a smart choice for your food budget and trip budget, using simple, affordable ingredients that maximize your fridge capacity and minimize food waste . For road trips, group camping, and van life, this veggie sandwich is an absolute winner. It’s a quick, satisfying meal that requires minimal cleanup—a lifesaver when you’re managing water and fridge space. It’s also endlessly customizable with whatever fresh veggies you have on hand, making it a great way to use up produce and avoid waste. Let’s build this fresh, crunchy, roadside lunch!Recipe Summary
Prep Time: 10 mins
Cook Time: 0 mins
Total Time: 10 mins
Servings: 2
Difficulty: Easy
Ingredients
- For the Sandwich Base:
- 4 slices of hearty bread (sourdough, whole wheat, or a crusty baguette)
- For the Creamy Spread:
- ½ cup hummus (or cream cheese, Greek yogurt, or avocado)
- 1 tbsp lemon juice
- 1 tbsp fresh herbs (parsley, dill, or chives)
- For the Fresh Veggie Layers:
- ½ cucumber, thinly sliced
- 1 carrot, shredded or thinly sliced
- ½ red bell pepper, thinly sliced
- 1 small handful of mixed greens or spinach
- ¼ red onion, thinly sliced (optional)
- Optional Toppings:
- Sliced avocado, sprouts, or a drizzle of your favorite BBQ recipe sauce for a smoky flavor twist
Step-by-Step Instructions
- Prepare the spread. In a small bowl, mix the hummus with lemon juice and herbs until smooth.
- Spread. Generously spread the mixture on one side of each slice of bread.
- Layer the veggies. On two of the slices, start with the greens. Then layer the cucumber, carrot, bell pepper, and red onion (if using).
- Add optional extras. If using avocado, add it now.
- Top and press. Place the remaining bread slices on top, spread-side down. Press gently to help the sandwich hold together.
- Wrap and go. For road trip travel, wrap the sandwich tightly in parchment paper or plastic wrap.
Pro Tips for the Perfect RV Sandwich
- Toast for texture. If you have access to a stovetop or skillet, a quick toast adds a wonderful texture.
- Wrap it tight. To prevent a soggy sandwich, pat your veggies dry before assembling. Wrapping the sandwich tightly also helps keep it intact and fresh in your cooler space .
- Pack for the road. Pre-portion your sandwiches and store them in a dedicated cooler compartment or your RV fridge for easy access on travel days .
- Meal prep components. For longer road trips, prep all your veggie toppings and store them in a storage planner container in your RV fridge. This keeps your fridge organized and makes assembly a breeze .
Customize Your Campsite Veggie Sandwich
- Mediterranean Style: Add crumbled feta cheese, kalamata olives, and a drizzle of tzatziki for a Mediterranean flair.
- Smoky BBQ Veggie: Spread a layer of your favorite BBQ recipe sauce on the bread for a smoky kick. It pairs especially well with grilled vegetables like zucchini or eggplant.
- Use leftover grilled chicken: If you have leftover grilled chicken from a previous BBQ recipe, this veggie sandwich is a perfect vehicle for it!
- Bruschetta Style: Use fresh mozzarella, tomato, and basil.
- Protein-Packed: Add a spread of hummus or a couple of hard-boiled eggs for extra protein .
Storing and Reheating Leftovers
Storage: Store assembled sandwiches in an airtight container in your RV fridge for up to 2 days. Be mindful of your fridge capacity and use a storage planner to keep your fridge organized .
Reheating: This is a no-cook meal, but you can toast the sandwich in a dry skillet for a minute or two if you prefer a warm, melty option. It’s best enjoyed fresh and cool for a roadside lunch!
Frequently Asked Questions (FAQ)
-
Can I make this veggie sandwich ahead of time?
Absolutely! It’s a great make-ahead meal. To avoid a soggy sandwich, keep wet veggies like tomatoes and cucumber separate until ready to eat, or pat them dry before assembling .
-
What type of bread works best?
Hearty breads like sourdough, whole wheat, or a crusty baguette hold up well. Avoid soft bread that can get soggy quickly.
-
Can I use leftover grilled chicken in this recipe?
Yes! This is a fantastic way to repurpose leftover grilled chicken from a previous BBQ recipe. The smoky flavor adds a delicious twist. Just slice it and add it as a layer.
-
How do I adapt this for a smaller campervan kitchen?
This recipe is already perfect for small spaces—no cooking required! Use shelf-stable hummus and store fresh veggies in a cooler or your RV fridge. A meal planner will help you pack the exact ingredients you need, keeping your grocery list short and your food costs optimized.
-
Can I make this without bread?
Yes! Use large lettuce leaves as a low-carb, gluten-free wrap alternative.