Quick RV Tuna Sandwich Wrap Lunch Recipe (No Cook, 10-Minute Meal)
Fresh, light, and ready in a flash – the perfect wrap for a motorhome lunch on the go.
Recipe Summary
Prep Time: 10 mins
Cook Time: 0 mins (no cook)
Total Time: 10 mins
Servings: 2–4 wraps
Difficulty: Easy
Ingredients
- 2 cans (5 oz each) tuna in water, drained
- 1/4 cup mayonnaise (or plain Greek yogurt)
- 1 tbsp Dijon mustard (optional)
- 1 stalk celery, finely diced
- 1/4 red onion, finely diced
- 1/4 cup dill pickle relish (or chopped pickles)
- Salt and pepper to taste
- 4 large flour tortillas (or whole wheat)
- Optional: lettuce leaves, tomato slices, avocado
Instructions
- Make the tuna salad: In a medium bowl, combine the drained tuna, mayonnaise (or yogurt), mustard (if using), celery, red onion, and pickle relish. Mix well until everything is evenly coated.
- Season: Add salt and pepper to taste. Give it a taste and adjust seasonings – add more relish for sweetness, or more mustard for tang.
- Prep the tortilla: Lay a tortilla flat on a clean surface. If you want extra freshness, add a layer of lettuce leaves in the center.
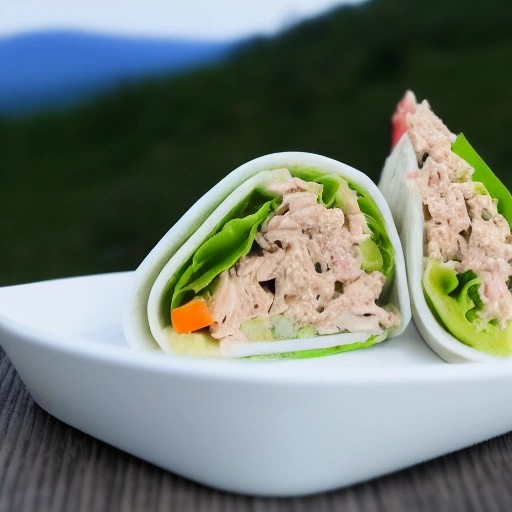
- Assemble the wrap: Spoon a generous portion of the tuna salad onto the center of the tortilla. Top with tomato slices and avocado if using.
- Roll it up: Fold in the sides of the tortilla, then roll tightly from the bottom up, like a burrito. Press gently to secure.
- Serve: Cut in half (or leave whole) and enjoy immediately. Perfect for picnics, road trips, or a quick lunch at camp!
Tips & Troubleshooting
- Prevent soggy wraps: If you’re making these ahead of time, add the lettuce and tomato just before serving, or pat them dry with a paper towel to remove excess moisture.
- Make it creamy without mayo: Use mashed avocado or plain Greek yogurt for a healthier, lighter dressing. It adds creaminess and extra nutrients.
- Add crunch: For extra texture, toss in some chopped nuts, sunflower seeds, or crispy bacon bits.
- Warm the tortilla: If you have a skillet or microwave, warm the tortilla for 10–15 seconds – it makes it more pliable and easier to roll without cracking.
- Customize the veggies: Bell peppers, shredded carrots, or cucumber slices are great additions. Use whatever fresh produce you have on hand.
Variations
- Spicy tuna wrap: Add 1/2 tsp sriracha or hot sauce to the tuna mixture, and top with sliced jalapeños for a kick.
- Mediterranean style: Swap relish for chopped olives and sun-dried tomatoes. Add crumbled feta cheese and a drizzle of balsamic glaze.
- Healthy green wrap: Use a spinach or tomato-basil tortilla, and add extra greens like arugula or spinach. Skip the mayo and use hummus instead.
- Smoky BBQ tuna wrap: Mix 2 tbsp BBQ sauce into the tuna salad. Add sliced red onion and crispy lettuce for a smoky-sweet flavor.
- Breakfast tuna wrap: Add a scrambled egg and a slice of cheddar cheese for a protein-packed breakfast version.
Storage & Make-Ahead Tips
Best enjoyed fresh, but you can prepare the tuna salad up to 2 days in advance. Store it in an airtight container in the fridge.
If you’re meal-prepping wraps for the week, assemble them without the lettuce and tomato (add those later). Wrap tightly in plastic wrap or foil and refrigerate for up to 1 day. The tortilla may soften slightly, but it’ll still taste great.
Not recommended for freezing, as the texture of the mayo and veggies will change. For a hot meal, you can pan-sear the wrapped wrap in a skillet for 2–3 minutes per side until golden and crispy.
Frequently Asked Questions
- Can I use canned salmon instead of tuna?
- Absolutely! Canned salmon works perfectly in this recipe. Just flake it with a fork and follow the same steps. It has a richer flavor and is packed with omega-3s.
- Can I make this dairy-free?
- Yes – use vegan mayo or avocado instead of Greek yogurt. Skip the cheese (if using) and opt for a dairy-free wrap like spinach or gluten-free tortilla.
- What’s the best way to drain tuna?
- Open the can and press the lid firmly over the top to squeeze out excess water. Or, use a fine-mesh strainer for a more thorough drain. The drier the tuna, the better your wrap will hold together.
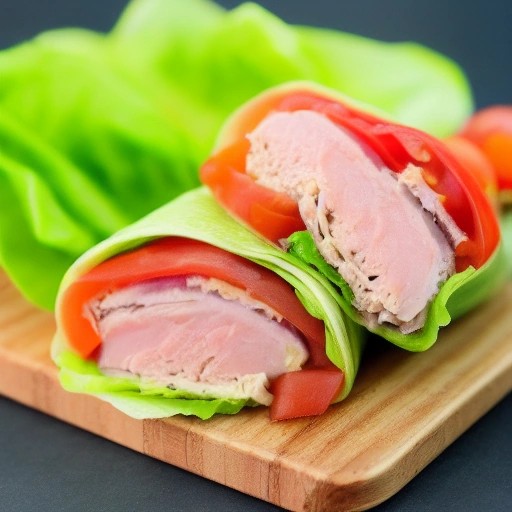
- Can I use lettuce wraps instead of tortillas?
- Yes! For a low-carb, gluten-free option, use large iceberg or butter lettuce leaves as wraps. They add a refreshing crunch and reduce carbs.
- How do I keep wraps from unrolling?
- Roll them tightly and place the seam-side down on the plate. You can also secure them with toothpicks or wrap them in parchment paper – it helps them hold their shape.