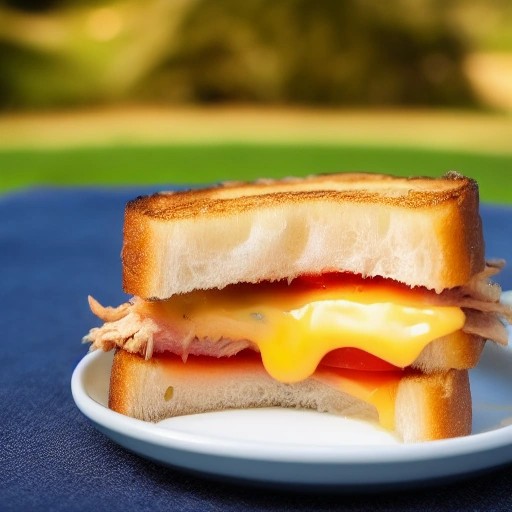
10 Minute RV Tuna Melt Sandwich Recipe – Crispy, Cheesy & Comforting
Recipe Summary
Prep Time: 5 mins
Cook Time: 5 mins
Total Time: 10 mins
Servings: 2 sandwiches
Difficulty: Easy
Ingredients
- 1 can (5 oz) tuna in water, drained well
- ¼ cup mayonnaise (or Greek yogurt for lighter version)
- 1 tbsp Dijon mustard
- ¼ cup celery, finely diced (optional)
- 2 tbsp red onion, finely diced (optional)
- Salt and black pepper to taste
- 4 slices bread (sourdough, whole wheat, or rye work great)
- 2 tbsp butter or olive oil (for frying)
- 4 slices cheddar, Swiss, or provolone cheese
- Pickle slices (optional, for serving)
How to Make Tuna Melts in Your RV
- Make the tuna filling: In a small bowl, combine drained tuna, mayonnaise, mustard, celery, red onion (if using), salt, and pepper. Mix well until everything is evenly combined.
- Butter the bread: Spread butter or olive oil on one side of each slice of bread. This will give you that perfect golden, crispy crust.
- Assemble the sandwiches: Place 2 slices of bread, buttered side down, on a cutting board. Divide the tuna mixture evenly between them, spreading it to the edges. Top with 2 slices of cheese each, then place the remaining bread slices on top, buttered side up.
- Cook the sandwiches: Heat a large skillet or griddle over medium heat on your propane stove. Carefully place the sandwiches in the skillet. Cook for 2-3 minutes, until the bottom is golden brown and crispy.
- Flip and melt: Carefully flip the sandwiches using a spatula. Cook for another 2-3 minutes, pressing down gently with the spatula, until the second side is golden brown and the cheese is fully melted and gooey.
- Serve hot: Remove from the skillet, slice in half, and serve immediately with pickle slices on the side. Enjoy this classic comfort food wherever you’re parked!
RV Kitchen Tips for Perfect Tuna Melts
- Propane conservation: This recipe uses medium heat for about 4-6 minutes total. Check your propane gauge before cooking – it’s one of the most fuel-efficient meals you can make, leaving plenty for the water heater and propane fridge.
- Drain the tuna well: Squeeze out as much water as possible from the canned tuna to prevent soggy sandwiches. Use a fork to press the tuna against the side of the can or use a fine mesh strainer.
- Get that perfect golden crust: Don’t rush the cooking process. Medium heat allows the bread to toast slowly while the cheese melts completely. Using butter gives the best flavor and color, but olive oil works well too.
- Fridge space saver: This recipe uses mostly pantry staples (canned tuna, mayo, mustard), saving precious refrigerator capacity for perishables like cheese and celery. It’s perfect for food storage on long trips.
- One-pan cleanup: Wipe the skillet with a paper towel while it’s still warm to remove any cheese or bread residue. This saves fresh water and reduces gray water in your tank.
5 Delicious Twists on Your RV Tuna Melt
- Spicy tuna melt: Add 1-2 tsp of sriracha or hot sauce to the tuna mixture, and top with pepper jack cheese.
- Mediterranean style: Add chopped olives, sun-dried tomatoes, and feta cheese. Use oregano and a drizzle of olive oil.
- Bacon tuna melt: Add crispy bacon strips to the sandwich before frying for extra smoky crunch.
- Open-faced version: Skip the top slice of bread, pile on the tuna and cheese, and broil or fry until the cheese is bubbly and golden.
- Green goddess: Add mashed avocado and fresh basil to the tuna mixture, and use provolone cheese for a fresh, herbaceous twist.
Storing & Reheating Leftover Tuna Melts
How to store: Store any leftover tuna filling in an airtight container in the RV refrigerator for up to 3 days. Keep the cooked sandwiches separate and refrigerate for up to 2 days. To maximize refrigerator capacity, use stackable containers that fit your camper fridge efficiently.
Reheating without sogginess: Reheat leftover sandwiches in a skillet over medium-low heat for 2-3 minutes per side to restore crispiness. You can also use a toaster oven if you have one. Avoid microwaving, as it makes the bread soggy and rubbery.
Freezer tip: The tuna filling freezes well for up to 2 months, but the bread doesn’t freeze well when assembled. Freeze the filling separately and make fresh sandwiches when you’re ready to eat.
Frequently Asked Questions
Can I make this on a gas grill instead of a stove?
Absolutely! Use a cast iron skillet or a griddle attachment on your gas grill. This adds a subtle smoky flavor to the bread and cheese. Just be careful with the heat – keep it at medium to prevent burning.
How much propane does this meal use?
This recipe uses medium heat for about 4-6 minutes total. On average, it consumes roughly 0.05 lbs of propane – extremely efficient! Always check your propane tank gauge before cooking, especially if you’re also using the propane fridge or water heater.
What if I don’t have mayonnaise?
You can substitute with plain Greek yogurt, sour cream, or even mashed avocado. Each will give a slightly different flavor and texture, but all work well. This is a great way to use what you have in your RV fridge.
How do I manage water usage when cleaning the skillet?
To conserve fresh water and minimize gray water, wipe the skillet clean with a paper towel while it’s still warm. Use a small amount of water and biodegradable soap – a little goes a long way. This is an excellent water conservation practice for boondocking.
Can I use canned chicken instead of tuna?
Yes! Canned chicken works beautifully in this recipe. Follow the same instructions and use your favorite seasonings. This is a great way to add variety to your camp meals and use up food storage items.
Motorhome chef pro tip: Before you hit the road, use a meal calculator to plan your portions and a propane calculator to estimate your fuel needs. And don’t forget to check your water tank capacity – this quick tuna melt is designed to use minimal water, keeping you on the road longer. Safe travels and happy cooking!