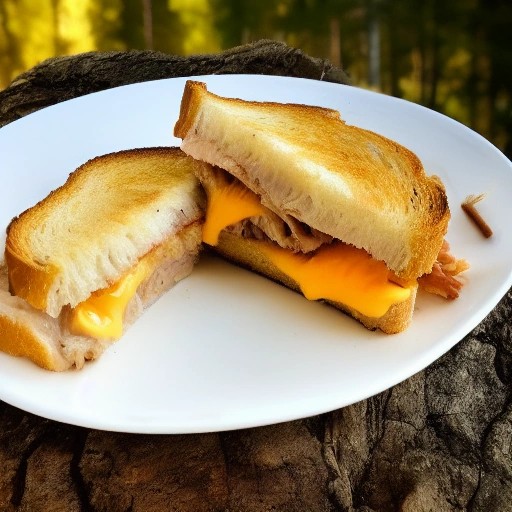
Cheap RV Tuna Melt Sandwich Skillet Recipe: A Smoky, Gooey Budget Campground Classic
Some of the best camping meals are the ones that are simple, comforting, and easy on the wallet. This Cheap RV Tuna Melt Sandwich Skillet Recipe is exactly that—a warm, gooey, crispy sandwich that comes together in minutes using affordable pantry staples. It’s the ultimate budget-friendly lunch or dinner that tastes like a diner classic.
This recipe is perfect for cost-conscious campers. Canned tuna is one of the most affordable proteins out there, and when combined with melty cheese and crispy, buttery bread, it transforms into something truly special. For an extra smoky BBQ recipe twist, toast the sandwiches on your charcoal grill or gas grill instead of a skillet.
1. Introduction
This Cheap RV Tuna Melt Sandwich Skillet Recipe is the ultimate budget-friendly camping meal, combining creamy, flavorful tuna salad with crispy, buttery bread and gooey melted cheese for a diner-style classic that costs just pennies per serving. It’s the perfect solution for campers who want a delicious, satisfying meal without breaking the bank.
The beauty of this recipe is its simplicity. Canned tuna is shelf-stable, affordable, and packed with protein. Paired with a few basic ingredients—bread, cheese, and a simple tuna salad—it becomes a meal that feels indulgent but is actually very budget-friendly. For that extra layer of flavor, toast the sandwiches on your gas grill or charcoal grill for a smoky char.
2. Recipe Card
Recipe Summary
Prep Time: 5 mins
Cook Time: 8 mins
Total Time: 13 mins
Servings: 4
Difficulty: Easy
Ingredients
- 2 cans (5 oz each) tuna in water, drained
- 1/4 cup mayonnaise (or plain Greek yogurt)
- 1 celery stalk, finely diced (optional)
- 1/4 red onion, finely diced
- 1 tablespoon lemon juice
- 8 slices of your favorite bread
- 4 slices of cheese (cheddar, Swiss, or American)
- 2 tablespoons butter, softened
- Salt and pepper to taste
- Optional Add-ins:
- 1/2 teaspoon smoked paprika (for smoky flavor)
- 1 tablespoon chopped fresh dill or parsley
- 1/2 teaspoon garlic powder
- Hot sauce
- For Serving:
- Pickles
- Chips or fries
Note: For a smoky BBQ recipe twist, toast the sandwiches on your charcoal grill or gas grill instead of a skillet. The smoky char adds incredible depth. Add a pinch of smoked paprika to the tuna salad for even more smoky flavor.
3. Instructions (Step-by-step)
Step 1: Make the Tuna Salad
In a medium bowl, combine the drained tuna, mayonnaise, diced celery (if using), red onion, lemon juice, and any optional seasonings. Mix well. Season with salt and pepper to taste.
Step 2: Assemble the Sandwiches
Spread butter on one side of each slice of bread. Place four slices of bread buttered-side down on a clean surface. Top each with a slice of cheese, then a generous scoop of tuna salad, and finally another slice of cheese. Top with the remaining bread slices, buttered-side up.
Step 3: Cook in a Skillet (Stove Method)
Heat a large skillet over medium heat on your RV stove. Place the sandwiches in the skillet. Cook for 2-3 minutes per side, pressing down gently with a spatula, until golden brown and crispy and the cheese is melted. The butter should be sizzling.
Step 4: Cook on the Grill (Grill Method)
For extra smoky flavor, preheat your gas grill or charcoal grill to medium heat (350-375°F). Place the assembled sandwiches directly on the grill grates. Cook for 2-3 minutes per side, until golden brown with grill marks and the cheese is melted. Use a spatula to flip carefully. If using a charcoal grill, place the sandwiches on the cooler side to avoid burning.
Step 5: Serve
Remove from the heat and let rest for a minute. Cut in half and serve hot with pickles, chips, or fries on the side.
4. Tips Section
- Stretch Your Budget: Tuna is one of the cheapest proteins. To make the meal go even further, add extra diced celery, onion, or even shredded carrots to the tuna salad.
- Crispy, Golden Crust: Use butter generously on the outside of the bread. For extra flavor, use garlic butter or add a sprinkle of garlic powder to the butter.
- Grill for Smoky Flavor: For that BBQ recipe taste, cook the sandwiches on your charcoal grill or gas grill. The grill marks and smoky char add incredible flavor.
- Perfect Melty Cheese: Use cheese that melts well, like cheddar, American, Swiss, or provolone. Adding a lid to the skillet for the last minute traps heat and melts the cheese faster.
- No Mayonnaise? Use plain Greek yogurt or mashed avocado instead—both are creamy and budget-friendly.
- Use Any Bread: White, whole wheat, sourdough, or even English muffins all work great. Choose whatever is cheapest or what you have on hand.
5. Variations
- Spicy Version: Add sriracha or hot sauce to the tuna salad. Use pepper jack cheese and top with sliced jalapeños.
- BBQ Tuna Melt: Add 2 tablespoons of BBQ sauce to the tuna salad. Use smoked cheddar and cook on your charcoal grill for extra smoky flavor.
- Healthy Version: Use whole wheat bread, Greek yogurt instead of mayonnaise, and low-fat cheese. Add extra vegetables like spinach or tomatoes.
- Smoky Version: Add smoked paprika to the tuna salad. Cook the sandwiches on your charcoal grill or gas grill for ultimate smoky flavor. Use smoked cheese.
- Deluxe Version: Add crispy bacon slices or leftover grilled chicken from your gas grill to the sandwich for extra protein and flavor.
- Budget-Friendly Version: Use store-brand tuna and bread. Skip the celery if it’s expensive and use more onion. This is a very budget-friendly recipe to begin with!
6. Storage Instructions
- How to Store Leftovers: These sandwiches are best enjoyed fresh, but you can store leftover assembled sandwiches in an airtight container in your camper fridge for up to 2 days.
- Reheating Without Sogginess: To reheat, use a skillet over medium heat for 2-3 minutes per side until crispy again. You can also reheat on your gas grill or in a toaster oven. Avoid microwaving, as it makes the bread soft and chewy.
- Tuna Salad Storage: Store leftover tuna salad separately in an airtight container in your RV fridge for up to 3 days. This is great for quick lunches.
- Food Safety: Ensure any leftovers are properly cooled and stored in your RV refrigerator at or below 40°F. If you’re boondocking and monitoring your propane usage for your propane fridge, keep the door closed as much as possible.
7. FAQ Section
Q: Can I cook these tuna melts on the grill?
Absolutely! Grilling adds incredible smoky flavor. Preheat your charcoal grill or gas grill to medium heat (350-375°F) and cook the sandwiches directly on the grates for 2-3 minutes per side. Use a spatula to flip carefully.
Q: What’s the best bread for tuna melts?
Sourdough, white bread, whole wheat, or rye all work great. For a crispy crust and sturdy structure, use thicker slices. Choose whatever is most affordable.
Q: How do I keep the tuna melt from getting soggy?
Drain the tuna very well. Pat it dry with paper towels if needed. Also, don’t over-sauce—use just enough mayonnaise to bind the tuna. Toasting the bread on the grill or skillet also helps create a moisture barrier.
Q: What cheese melts best on tuna melts?
Cheddar, American, Swiss, provolone, and Monterey Jack all melt beautifully. For the best flavor, use a cheese you love. For a smoky twist, use smoked cheddar or gouda.
Q: Can I use canned chicken instead of tuna?
Yes! Canned chicken works great as a substitute. It’s often similarly priced and has a mild flavor that works well in this recipe.
Q: What can I serve with tuna melts?
Pickles, potato chips, fries, coleslaw, or a simple green salad are all great options. For a budget-friendly side, serve with carrot sticks or apple slices.
Q: How can I add more smoky flavor without a grill?
Add 1/4 to 1/2 teaspoon of smoked paprika to the tuna salad. You can also use liquid smoke or smoked salt. If you have leftover grilled chicken from your gas grill, add it to the sandwich for smoky flavor.