Roadside Lunch Cheesesteak Skillet Wrap Filling: A Grilled Philly Classic
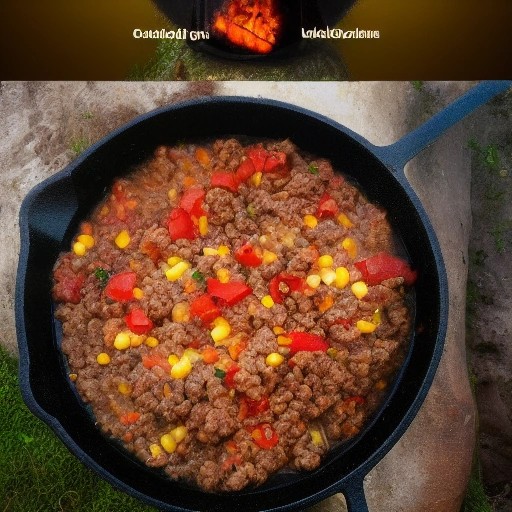
Picture this: you’re on the open road, the windows are down, and your stomach is starting to rumble. You could stop at a fast-food joint, or you could pull over at a scenic rest stop and whip up this incredible Roadside Lunch Cheesesteak Skillet Wrap Filling in minutes. It captures all the savory, cheesy goodness of a classic Philly cheesesteak, but with that irresistible smoky char that only comes from cooking on a grill.
This recipe is the ultimate road trip meal—quick, satisfying, and packed with bold flavors. Thinly sliced beef, sweet onions, and bell peppers are grilled to perfection in a cast-iron skillet, then smothered in melty provolone cheese. It’s beginner-friendly, uses simple ingredients, and comes together in under 20 minutes. Whether you’re cooking at a campground, a rest area, or in your own backyard, this grilled cheesesteak filling will make you feel like a roadside gourmet chef.
Recipe Summary
Prep Time: 10 mins
Cook Time: 15 mins
Total Time: 25 mins
Servings: 4
Difficulty: Easy
Ingredients
- 1.5 pounds beef sirloin or ribeye, thinly sliced against the grain
- 2 tablespoons olive oil, divided
- 1 large onion, thinly sliced
- 1 large bell pepper (green or red), thinly sliced
- 2 cloves garlic, minced
- 1 teaspoon garlic powder
- 1 teaspoon onion powder
- ½ teaspoon smoked paprika (for smoky flavor)
- Salt and black pepper to taste
- 8 slices provolone or American cheese (or 2 cups shredded)
- Optional: 1 tablespoon Worcestershire sauce
- For serving: hoagie rolls, tortillas, or lettuce wraps
Step-by-Step Instructions for Roadside Cheesesteak Skillet
- Preheat your grill. If using a gas grill, preheat to medium-high heat (around 400-425°F). For a charcoal grill, arrange the coals for direct heat. You should be able to hold your hand about 6 inches above the grate for 3-4 seconds. This high heat is essential for getting that quick sear on the beef.
- Season the beef. In a bowl, toss the thinly sliced beef with 1 tablespoon of olive oil, garlic powder, onion powder, smoked paprika, salt, and pepper. If using Worcestershire sauce, add it now for extra umami.
- Heat your skillet. Place a large cast-iron skillet or heavy-bottomed pan on the grill grate. Add the remaining 1 tablespoon of olive oil and let it heat up for about a minute until it shimmers.
- Cook the beef. Add the seasoned beef to the hot skillet in a single layer. Cook for 3-4 minutes, stirring occasionally, until it’s browned and cooked through. The high heat from the grill creates a beautiful caramelized crust on the meat, giving it that authentic smoky flavor that makes this dish so special.
- Sauté the vegetables. Remove the beef from the skillet and set it aside. Add the sliced onion and bell pepper to the same skillet. Cook for 4-5 minutes until they are soft and slightly charred at the edges. The direct heat caramelizes the natural sugars in the vegetables, adding sweetness and depth.
- Combine and melt the cheese. Return the beef to the skillet with the vegetables. Add the minced garlic and stir everything together. Cook for 1 minute until the garlic becomes fragrant. Top the mixture with the provolone or American cheese slices. Cover the skillet with a lid or aluminum foil and let it cook for 1-2 minutes until the cheese is completely melted and gooey.
- Serve immediately. Remove the skillet from the grill. Scoop the cheesy beef mixture into hoagie rolls, warm tortillas, or crisp lettuce wraps. Enjoy this roadside lunch masterpiece while it’s hot and melty!
Tips for the Best Roadside Cheesesteak Skillet
- Slice the Beef Thinly: For the best texture, freeze the beef for 15-20 minutes before slicing—this makes it easier to cut paper-thin slices. If you’re at camp, look for pre-shaved beef or ask your butcher to slice it for you.
- Don’t Overcrowd the Skillet: If your skillet is too full, the beef will steam instead of sear. Cook in batches if necessary. That golden-brown crust is what gives this dish its incredible flavor.
- Get That Smoky Flavor: For an even more pronounced smoky taste, add a smoker box with wood chips to your gas grill. On a charcoal grill, the flavor is already built in. You can also use a pinch of liquid smoke in the seasoning.
- Heat Zone Management: On a charcoal grill, create a two-zone fire. Start the skillet over direct heat for searing, then move to indirect heat when melting the cheese to prevent burning. On a gas grill, simply adjust the burner knobs.
- Cheese Choices: Provolone is the traditional choice for Philly cheesesteaks, but American, Swiss, or even pepper jack all work wonderfully. Use whatever you have on hand—it’ll be delicious!
Delicious Variations to Try
- Spicy Version: Add sliced jalapeños or banana peppers to the skillet with the onions and bell peppers. Sprinkle red pepper flakes over the finished filling for an extra kick.
- BBQ Cheesesteak Version: Brush the beef with your favorite BBQ sauce during the last minute of cooking. The sweet and tangy sauce pairs beautifully with the smoky grilled flavors for a unique BBQ recipe twist.
- Mushroom & Onion Version: Add sliced mushrooms to the skillet with the onions and peppers. The earthy mushrooms complement the beef perfectly and add extra texture.
- Chicken Cheesesteak Version: Swap the beef for thinly sliced grilled chicken. Season the chicken with the same spices and follow the same cooking instructions for a lighter alternative.
- Philly Breakfast Version: Crack a few eggs into the skillet after the cheese has melted and scramble them right in with the beef and vegetables. Serve in a wrap for an epic breakfast-on-the-road experience.
Storage and Reheating Instructions
To Store (at camp): Let the cheesesteak filling cool completely before transferring to an airtight container. Store in a cooler with ice packs for up to 3 days.
To Reheat (at camp): Return the filling to your skillet over low heat on the grill or campfire. Add a splash of broth or water to bring back moisture and stir occasionally until heated through. Top with extra cheese if desired. You can also reheat individual portions in a foil packet over the coals.
At Home: Store leftovers in the refrigerator for up to 4 days. Reheat in a non-stick skillet over medium heat, adding a little liquid to prevent drying out. Freeze for up to 3 months for future adventures.
Frequently Asked Questions (FAQ)
Can I make this cheesesteak filling on a gas grill?
Absolutely! A gas grill is perfect for this recipe. Its quick preheating and precise temperature control make it ideal for roadside cooking. Just preheat to medium-high and follow the instructions for delicious, smoky results in minutes.
What type of beef is best for cheesesteak filling?
Ribeye is the traditional choice for Philly cheesesteaks because of its marbling and tenderness. Sirloin is a great budget-friendly alternative. If you’re at camp, look for pre-shaved beef in the meat section—it’s perfectly thin and ready to cook.
How do I get a smoky flavor without a charcoal grill?
While a charcoal grill naturally provides that wonderful smokiness, you can achieve a similar effect on a gas grill by using a smoker box filled with wood chips (hickory or mesquite work great). Alternatively, the smoked paprika in the seasoning already adds a nice smoky undertone.
Can I use pre-cooked beef for this recipe?
You can use leftover roast beef or pre-cooked steak, but the flavor won’t be quite as rich. If using pre-cooked, simply slice it thinly, add it to the skillet with the vegetables to heat through, and top with cheese. For the best flavor, I recommend cooking fresh beef directly on the grill.
What else can I do with this filling besides wraps?
This filling is incredibly versatile! Use it for loaded nachos, stuffed baked potatoes, quesadillas, or rice bowls. You can also serve it over a bed of salad greens for a low-carb option, or stuff it into pita bread for a delicious sandwich.
How can I make this dish gluten-free?
Simply serve the filling in gluten-free tortillas or crisp lettuce wraps instead of hoagie rolls. The filling itself is naturally gluten-free—just check that your Worcestershire sauce and other seasonings are gluten-free certified.