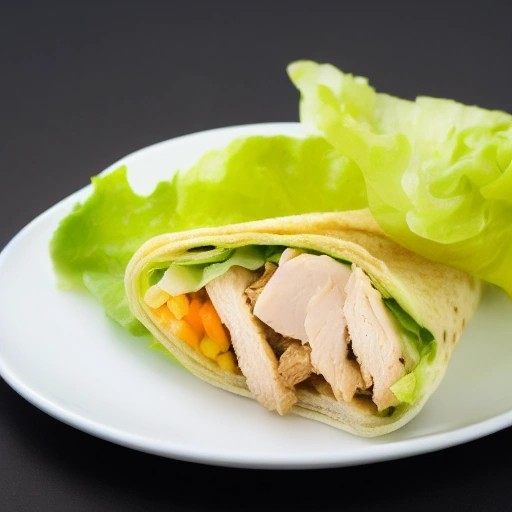
RV Air Fryer Chicken Sandwich Crispy Style Recipe (Grilled Perfection) | Best Homemade Crispy Chicken Sandwich
Get ready for the crispiest, juiciest, and most flavorful chicken sandwich you can make right in your RV. This sandwich features a perfectly golden, crunchy chicken breast with a tender, juicy interior, all finished with a smoky char from the grill that takes it to a whole new level.
This recipe combines the speed and convenience of your RV air fryer with the authentic grilled flavor of a charcoal or gas grill. We’ll show you how to achieve that crispy, restaurant-quality breading and irresistible smoky aroma, all while keeping things simple and beginner-friendly. Whether you’re craving a classic chicken sandwich or want to impress your fellow campers, this recipe is a guaranteed winner.
Recipe Summary
Prep Time: 15 mins
Cook Time: 14 mins (Air Fryer) + 4 mins (Grill)
Total Time: 33 mins
Servings: 4
Difficulty: Easy
Ingredients
- 2 boneless, skinless chicken breasts (about 6 oz each), sliced in half horizontally to make 4 thin cutlets
- 1/2 cup all-purpose flour
- 2 large eggs, beaten
- 1 cup panko breadcrumbs
- 1/2 cup grated Parmesan cheese
- 1 tsp garlic powder
- 1 tsp smoked paprika (for that grilled flavor)
- 1/2 tsp onion powder
- 1/2 tsp salt
- 1/4 tsp black pepper
- Olive oil spray or cooking spray
- 4 brioche or hamburger buns
- Toppings: lettuce, tomato, pickles, mayo, or your favorite sauce
Step-by-Step Instructions
- Prep the Chicken: Place each chicken breast between two sheets of plastic wrap and gently pound to an even 1/2-inch thickness. Pat dry with paper towels—this helps the breading stick.
- Set Up the Breading Station: Place the flour in one shallow dish. Beat the eggs in a second dish. In a third dish, combine the panko breadcrumbs, Parmesan cheese, garlic powder, smoked paprika, onion powder, salt, and pepper.
- Bread the Chicken: Dredge each cutlet in the flour, shaking off excess. Dip into the beaten egg, then press firmly into the breadcrumb mixture, coating both sides evenly. Spray both sides with olive oil spray to help with browning.
- Air Fry the Chicken: Preheat your RV air fryer to 380°F (190°C). Place the breaded cutlets in a single layer in the basket (cook in batches if needed). Air fry for 12-14 minutes, flipping halfway, until golden brown and cooked through (internal temp of 165°F).
- Fire Up the Grill: While the chicken is air frying, preheat your grill or grill pan to medium-high heat (around 400°F). For a charcoal grill, create a hot zone by arranging coals to one side. For a gas grill, preheat all burners to medium-high.
- Grill for Smoky Char: Carefully transfer the air-fried chicken to the hot grill. Place them directly over the heat and grill for 2 minutes per side, until they get beautiful char marks and a smoky aroma.
- Toast the Buns: While the chicken is grilling, place the buns cut-side down on the grill for 30-60 seconds until lightly toasted.
- Assemble and Serve: Spread your favorite sauce on the toasted buns. Add lettuce, tomato, pickles, and the crispy chicken. Serve immediately.
Grilling Tips for the Perfect Crispy Chicken Sandwich
- Avoid Soggy Breading: Pounding the chicken to an even thickness and patting it dry ensures the breading sticks. The air fryer creates a super crispy crust, and the quick grill finish adds smoky flavor without making the breading soft.
- Perfect Grill Marks: To get those impressive crosshatch marks, place the chicken diagonally on the grill grates. After 1 minute, rotate it 90 degrees and cook for the remaining time on that side.
- Controlling Heat Zones: If using a charcoal or gas grill, set up a two-zone fire. Use the direct heat zone for the quick sear, but move the chicken to indirect heat if it starts to burn.
- Prevent Sticking: Make sure your grill grates are clean and lightly oiled before adding the chicken. A quick wipe with an oil-soaked paper towel (using tongs) right before grilling will do the trick.
Delicious Variations to Try
- Spicy Chicken Sandwich: Add 1/2 tsp of cayenne pepper and 1/2 tsp of chili powder to the breadcrumb mixture. Top with pepper jack cheese and spicy mayo.
- Buffalo Chicken Sandwich: Toss the grilled chicken in buffalo sauce. Top with blue cheese crumbles, lettuce, and ranch dressing.
- Honey Mustard Chicken Sandwich: Spread honey mustard sauce on the buns and top with crispy bacon and Swiss cheese.
- BBQ Chicken Sandwich: Brush the chicken with BBQ sauce during the last minute of grilling. Top with cheddar cheese, crispy onion rings, and extra BBQ sauce.
- Parmesan-Herb Chicken Sandwich: Add 1 tbsp of dried basil and 1 tbsp of dried oregano to the breadcrumb mixture. Top with marinara sauce and mozzarella cheese for a chicken Parm-style sandwich.
Storing and Reheating Leftovers
To store: Place leftover chicken cutlets in an airtight container and refrigerate within 2 hours. They will keep for up to 3 days. For longer storage, freeze them in a single layer on a baking sheet, then transfer to a freezer bag for up to 2 months.
To reheat without losing crispiness: The air fryer is the absolute best way to reheat the chicken. Reheat at 350°F for 4-5 minutes until hot and crispy again. You can also reheat on a grill over medium heat for 2-3 minutes per side. Avoid microwaving—it makes the breading soft and soggy.
Frequently Asked Questions (FAQ)
-
How long do I air fry chicken for a crispy sandwich?
At 380°F, air fry the breaded chicken cutlets for 12-14 minutes, flipping halfway. The internal temperature should reach 165°F. Thinner cutlets may cook faster, so check them early. -
What is the best grill temperature for chicken sandwiches?
For the final grilling step, aim for medium-high heat (around 400°F). This is hot enough to create beautiful char marks and a smoky flavor without burning. Since the chicken is already cooked, the grill is just for that finishing touch. -
Can I cook this chicken entirely on a charcoal or gas grill?
Absolutely! You can skip the air fryer and cook the breaded chicken directly on the grill over medium heat for 5-7 minutes per side, using a grill mat or well-oiled grates. The air fryer method is just quicker and gives a more consistent crunch. -
Why did my breading fall off in the air fryer?
This usually happens if the chicken isn’t patted dry before breading, or if you don’t press the breadcrumbs firmly enough. Also, letting the breaded chicken rest for 10 minutes before air frying helps the coating adhere better. -
Can I use frozen chicken for this recipe?
Yes, but make sure to thaw it completely in the refrigerator overnight and pat it very dry before breading. Frozen chicken holds more water, so drying it thoroughly is essential for achieving a good sear and crispy crust.