Easy Cheap RV Bean Chili Skillet: Hearty One-Pan Dinner
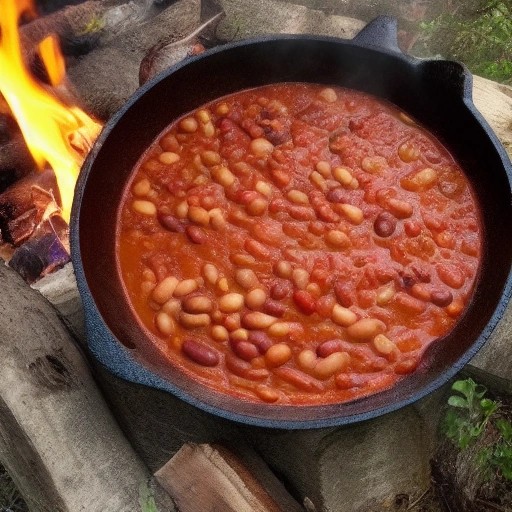
This Easy Cheap RV Bean Chili Skillet is the ultimate no-fuss, one-pan meal that delivers bold, smoky flavors and hearty satisfaction in under 25 minutes. Packed with protein-rich beans, tender vegetables, and a rich, spiced tomato sauce, this chili is the perfect budget-friendly comfort food for chilly evenings or casual campground dinners. It’s the kind of meal that warms you up and fills you up without emptying your wallet.
Designed specifically for RV kitchens with limited space and resources, this recipe uses pantry staples like canned beans, diced tomatoes, and common spices. Everything cooks in one skillet, meaning minimal dishes and maximum flavor. It’s naturally vegetarian, easily made vegan, and endlessly customizable—add your favorite veggies, adjust the heat level, or top with cheese and sour cream for extra indulgence. This is the kind of simple, satisfying, and affordable meal that makes motorhome living a true pleasure.
Recipe Summary
Prep Time: 5 mins
Cook Time: 18 mins
Total Time: 23 mins
Servings: 4
Difficulty: Super Easy
Ingredients
- 2 tbsp olive oil
- 1 onion, diced
- 2 cloves garlic, minced
- 1 bell pepper, diced (any color)
- 1 can (28 oz) crushed tomatoes or diced tomatoes
- 1 can (15 oz) kidney beans, drained and rinsed
- 1 can (15 oz) black beans, drained and rinsed
- 1 can (15 oz) pinto beans, drained and rinsed (or extra of your favorite)
- 2 tbsp chili powder
- 1 tsp ground cumin
- 1 tsp smoked paprika (for smoky flavor)
- 1/2 tsp garlic powder
- Salt and pepper to taste
- Optional toppings: shredded cheese, sour cream, green onions, fresh cilantro, pickled jalapeños
How to Make Bean Chili Skillet in One Pan
- Sauté the aromatics: Heat olive oil in a large skillet or Dutch oven over medium heat. Add the diced onion and bell pepper, cooking for 4-5 minutes until softened. Stir in the minced garlic and cook for 1 more minute until fragrant.
- Toast the spices: Add the chili powder, cumin, smoked paprika, and garlic powder. Cook for 30 seconds, stirring constantly, until the spices are aromatic and bloom in the oil.
- Add the main ingredients: Pour in the crushed tomatoes (with their juices) and add all three cans of drained beans. Stir well to combine.
- Simmer the chili: Bring the mixture to a gentle boil, then reduce heat to low. Cover and simmer for 12-15 minutes, stirring occasionally, to allow the flavors to meld together.
- Season and serve: Add salt and pepper to taste. If the chili seems too thick, add a splash of water or vegetable broth to reach your desired consistency. Ladle into bowls and top with your favorite garnishes. Serve hot with tortilla chips, cornbread, or over rice.
Tips for the Best RV Bean Chili
- Use smoked paprika for BBQ flavor: Smoked paprika adds that delicious smoky depth that mimics the flavor of grilled food. It’s a simple way to elevate this dish without extra ingredients.
- Adjust the spice level: For a milder chili, use less chili powder. For extra heat, add a diced jalapeño along with the onions or a pinch of cayenne pepper.
- Don’t rush the simmer: Letting the chili simmer for at least 10-15 minutes allows the flavors to meld and develop. The longer it simmers, the better it tastes!
- Make it a complete meal: Serve with a side salad, cornbread, or over rice for a fully satisfying dinner. This chili is also delicious over baked potatoes.
5 Delicious Variations to Try
- Spicy Chipotle Version: Add 1-2 chopped chipotle peppers in adobo sauce along with the tomatoes for a smoky, spicy kick. Top with fresh cilantro and lime wedges.
- Meaty Version: Brown 1 lb of ground beef or turkey before adding the onions, then continue with the recipe. This adds extra protein and savory flavor.
- Southwest Style: Add a can of corn kernels and a diced bell pepper for extra sweetness and color. Use a squeeze of lime juice at the end.
- Vegetable-Packed Version: Add diced zucchini, mushrooms, or sweet potatoes along with the onions for more texture and nutrition.
- Beer Chili Version: Replace 1/2 cup of the tomato liquid with a dark beer for a rich, malty depth. Simmer longer to cook off the alcohol.
Storage and Reheating Instructions
Store leftover chili in an airtight container in the RV refrigerator for up to 5 days. This chili freezes beautifully—portion it into freezer-safe containers for up to 3 months. To reheat, warm in a skillet over medium-low heat, adding a splash of water or broth to loosen the consistency. You can also microwave individual portions. The flavors often deepen overnight, making leftovers even more delicious.
Frequently Asked Questions (FAQ)
Can I use only one type of bean?
Absolutely! You can use just kidney beans, black beans, or any combination you have on hand. Each brings its own texture and flavor to the chili.
How can I add smoky flavor without a grill?
Smoked paprika, a dash of liquid smoke, or using a smoky chipotle salsa in place of some of the tomatoes mimics that wonderful charcoal or gas grill taste. Smoked salt also works beautifully.
Can I make this chili in a slow cooker?
Yes! Sauté the vegetables and spices on the stovetop first, then transfer everything to the slow cooker. Cook on low for 4-6 hours or high for 2-3 hours.
What can I serve with bean chili?
This chili is delicious on its own, but it’s even better with your favorite toppings. Try shredded cheese, sour cream, green onions, cilantro, or pickled jalapeños. It’s also great over rice, with cornbread, or scooped up with tortilla chips.
Can I add leftover grilled chicken or sausage to this chili?
Yes! Leftover grilled chicken, sausage, or even chopped brisket from a previous BBQ is a fantastic addition. Stir it in when you add the beans for extra protein and that delicious smoky flavor.