Easy RV Air Fryer Breakfast Eggs and Toast Cups: A 10-Minute Campsite Morning
Imagine waking up to the aroma of golden, crispy toast cradling perfectly baked eggs with melty cheese—all made in your RV air fryer in under 10 minutes with zero stovetop splatter. These Easy RV Air Fryer Breakfast Eggs and Toast Cups are the ultimate one-basket morning meal, combining crunchy bread, savory eggs, and gooey cheese into a portable, handheld breakfast. They’re perfect for busy campers who want a hearty start to the day without the cleanup.
This recipe is a game-changer for RV cooking and camp meals. The air fryer is the unsung hero of the campervan kitchen—it uses significantly less power than a conventional oven, making it perfect for boondocking and dry camping . It heats up almost instantly, delivers even, crispy results, and requires no preheating time . Plus, it’s a fantastic way to utilize your camping propane efficiently while keeping your fridge space free for other ingredients. For road trips, group camping, and van life, these toast cups are an absolute winner. They’re a quick, satisfying meal that minimizes cleanup—a lifesaver when you’re managing water and fridge capacity . They’re also a smart choice for your food budget and trip budget, using simple, affordable ingredients that store well in your RV fridge or cooler space. Let’s fire up that air fryer and get these breakfast cups started!Recipe Summary
Prep Time: 5 mins
Cook Time: 6-8 mins
Total Time: 12 mins
Servings: 2-4
Difficulty: Easy
Ingredients
- For the Toast Cups:
- 4 slices sandwich bread (white, wheat, or sourdough)
- 4 large eggs
- 1/4 cup shredded cheddar or mozzarella cheese
- 1 tbsp butter, softened (optional, for toasting)
- Salt and black pepper to taste
- Optional Add-ins:
- Cooked bacon, crumbled
- Diced ham, spinach, or tomatoes
- For Serving:
- Fresh parsley or chives, chopped
- Hot sauce or ketchup
Step-by-Step Instructions
- Preheat your air fryer. Set your air fryer to 350°F (175°C) and let it preheat for 3 minutes. Preheating ensures the bread gets that perfect golden crisp .
- Prepare the bread. Flatten each slice of bread with a rolling pin or the bottom of a glass. This helps it fit neatly into the cups and crisp evenly . For a sturdier structure, use slightly stale bread .
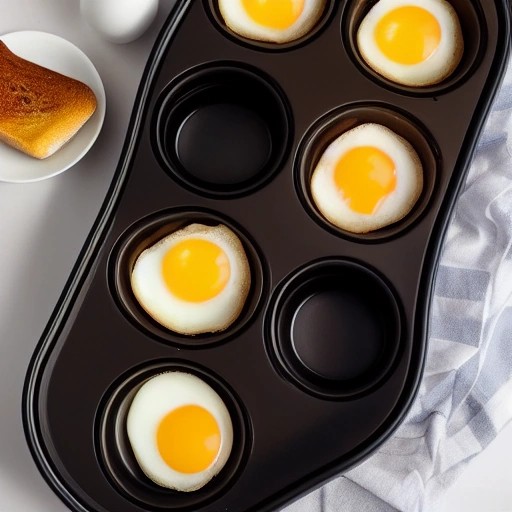
- Shape the toast cups. Press each slice of bread into a greased ramekin or silicone muffin cup to form a cup shape, with the sides rising up. Butter one side of the bread if desired for extra golden color .
- Add fillings and egg. Sprinkle a little cheese and any optional add-ins (like crumbled bacon) into the bottom of each bread cup. Carefully crack one egg into each cup .
- Season and top. Season with salt and pepper, then sprinkle the remaining cheese on top .
- Air fry. Place the cups in the air fryer basket. Cook at 350°F for 6-8 minutes, depending on how runny or set you prefer the yolks .
- Rest and serve. Carefully remove the toast cups from the air fryer and let them cool for 1-2 minutes . Garnish with fresh herbs and serve immediately.
Pro Tips for the Best RV Air Fryer Toast Cups
- Flatten the bread. Pressing the bread flat helps it fit into the cups and ensures even crisping. This step makes a big difference in texture .
- Grease the molds. Lightly spray ramekins or silicone cups with cooking spray to prevent sticking and make removal easy .
- Check early. Air fryer temperatures can vary. Start checking at the 6-minute mark—if you prefer a runny yolk, pull them out earlier .
- Pre-toast slightly. For extra crispiness, cook the bread cups for 2 minutes before adding the egg, then add the egg and continue cooking .
- Use thick bread. Thick-cut or artisan bread creates sturdier cups that hold their shape better .
Customize Your Campsite Breakfast
- Smoky BBQ Breakfast Cup: Add leftover grilled chicken and a drizzle of your favorite BBQ recipe sauce before baking for a sweet and savory twist. The smoky flavor from the air fryer and BBQ sauce pair beautifully.
- Bacon and Egg Toast Cups: Line the bottom of each bread cup with crumbled cooked bacon before adding the egg for a classic breakfast combo .
- Southwest Style: Add black beans, corn, and a sprinkle of cumin before baking. Top with salsa and avocado after cooking.
- Veggie-Packed Cups: Add diced bell peppers, spinach, or mushrooms along with the cheese for extra nutrients .
- Gluten-Free Version: Use gluten-free bread and ensure all add-ins are certified gluten-free.
Storing and Reheating Leftovers
Storage: Store leftovers in an airtight container in your RV fridge for up to 1 day . Toast cups are best enjoyed fresh, but they can be stored for a quick reheat. Be mindful of your fridge capacity and use a storage planner to keep your fridge organized.
Reheating: The best way to reheat these toast cups is in the air fryer at 320°F for 2-3 minutes to restore that crispy texture . Avoid the microwave, which can make the bread chewy and soggy.
Frequently Asked Questions (FAQ)
-
Can I make these in my RV without an air fryer?
Yes! You can bake them in a conventional RV oven at 375°F for 12-15 minutes, or cook them in a skillet on your gas grill or charcoal grill with a lid for a more pronounced smoky flavor.
-
Can I use leftover grilled chicken in this recipe?
Absolutely! This is a fantastic way to repurpose leftover grilled chicken from a previous BBQ recipe. Just dice it and add it to the toast cups before baking . It’s a great way to stretch your food budget and minimize food waste.
-
Can I use frozen bread or eggs?
It’s best to use fresh bread and eggs for this recipe. Frozen bread may not crisp properly, and frozen eggs won’t cook evenly.
-
How do I adapt this for a smaller campervan kitchen?
This air fryer recipe is already perfect for small spaces! To save on fridge space, use shelf-stable bread and eggs. A meal planner will help you pack the exact ingredients you need, keeping your grocery list short and your food costs optimized .
-
Can I make these dairy-free?
Yes! Simply omit the cheese or use a dairy-free cheese alternative. The eggs and bread are naturally dairy-free, and the dish will still be delicious.