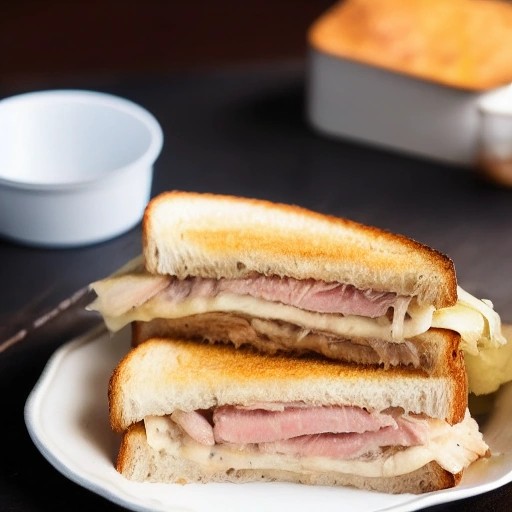
RV Pantry Only Canned Tuna Melt Sandwich Meal: Classic No-Cook Camp Comfort
Whip up this RV pantry only canned tuna melt sandwich meal for a protein-packed, satisfying lunch that comes together in minutes using nothing but shelf-stable ingredients from your camper pantry.
1. Introduction
When you’re craving something warm, melty, and satisfying but don’t want to fire up the stove, this RV pantry only canned tuna melt sandwich meal is your perfect solution. Combining protein-packed canned tuna with creamy dressing and melty cheese, this classic sandwich delivers all the comfort of a diner favorite – all without using a single drop of propane. It’s the ultimate solution for lazy camp days, quick lunches, or when you want something delicious with zero hassle.
While this recipe is designed to be no-cook, you can elevate it by toasting the bread on a charcoal grill or gas grill for that irresistible smoky flavor and crispy texture. The gentle heat from the grill melts the cheese beautifully and adds an authentic campfire taste that transforms this simple sandwich into something truly special. Whether you’re a weekend warrior, full-time van lifer, or boondocking in the wilderness, this recipe will become a go-to in your camp cooking repertoire.
2. Recipe Card
Recipe Summary
Prep Time: 5 mins
Cook Time: 0 mins (or 5 mins if toasting)
Total Time: 5-10 mins
Servings: 2
Difficulty: Easy
Ingredients
- 1 can (5 oz) tuna in water or oil (drained)
- 2 tablespoons mayonnaise or salad dressing (shelf-stable)
- 1 tablespoon relish or chopped pickles (optional)
- ½ teaspoon garlic powder
- ½ teaspoon onion powder
- Salt and pepper to taste
- 4 slices of bread (sandwich bread or rustic loaf)
- 4 slices of cheese (cheddar, American, or your favorite)
- Optional toppings:
- Hot sauce
- Pickle slices
- Mustard
3. Instructions (Step-by-step)
Step 1: Gather Your Ingredients
This recipe uses only pantry staples – no RV refrigerator required! Check your storage space for canned tuna, bread, and cheese. Canned tuna and shelf-stable cheese (like individual wrapped slices) don’t require refrigerator storage until opened.
Step 2: Make the Tuna Salad
In a small bowl, combine the drained tuna, mayonnaise, relish (if using), garlic powder, onion powder, salt, and pepper. Mix well with a fork until everything is combined and creamy. Taste and adjust seasonings as needed.
Step 3: Prepare Your Bread
If you want to toast your bread for extra crunch and smoky flavor, place the slices directly on a charcoal grill or gas grill over low heat for 1-2 minutes per side until golden and crisp. You can also skip this step for a no-cook version.
Step 4: Assemble the Sandwiches
Divide the tuna mixture evenly between two slices of bread. Spread it all the way to the edges. Top each with 2 slices of cheese and cover with the remaining bread slices.
Step 5: Melt the Cheese (Optional)
If you want a warm, melty tuna melt, place the assembled sandwiches on the grill over low heat for 2-3 minutes per side until the cheese is melted and the bread is golden brown. The smoky flavor from the grill adds incredible depth.
Step 6: Add Toppings and Serve
Remove from the grill and add any extra toppings like hot sauce, pickle slices, or mustard. Cut in half and serve warm. This classic camp meal is ready to enjoy!
4. Tips Section
Perfecting Your Tuna Melt
- Tuna Choices: Tuna in water is leaner and milder. Tuna in oil is richer and more flavorful. Use what you have in your RV pantry.
- Bread Options: Hearty breads like sourdough, rustic Italian, or whole grain hold up better to the filling. If using soft sandwich bread, toast it well to prevent sogginess.
- Cheese Selection: Cheddar, American, Swiss, or pepper jack all work great. Shelf-stable cheese slices are perfect for camping trips as they don’t need refrigerator storage.
Troubleshooting Common Issues
- Soggy Bread: Toast the bread well before adding the filling. This creates a barrier that prevents sogginess.
- Tuna Too Dry: Add an extra spoonful of mayonnaise or a splash of oil from the tuna can. A squeeze of lemon (if available) also helps.
- Bland Flavor: Don’t be shy with seasonings! Garlic powder, onion powder, and a dash of hot sauce add depth. Relish or pickles add tangy brightness.
- Cheese Not Melting: If using a gas grill, close the lid to trap heat. For charcoal grills, place the sandwich on the cooler side with the lid closed.
5. Variations
1. Spicy Tuna Melt
Add hot sauce, red pepper flakes, or sliced jalapeños to the tuna mixture. Use pepper jack cheese for extra heat. This version brings the fire for bold flavor lovers.
2. BBQ Tuna Melt
Add 1 tablespoon of your favorite BBQ recipe sauce to the tuna mixture and top with cheddar cheese. The smoky flavor from the BBQ sauce transforms the sandwich beautifully.
3. Mediterranean Tuna Melt
Add chopped olives, sun-dried tomatoes, and a sprinkle of oregano. Top with provolone or feta cheese (if available). This version brings the flavors of the Mediterranean.
4. Tuna and Egg Melt
Add a chopped hard-boiled egg (if available) to the tuna mixture. This adds extra protein and richness.
5. Open-Faced Tuna Melt
Skip the top slice of bread and serve the tuna and cheese open-faced. This reduces carbs and lets you pile on extra toppings.
6. Tuna Melt Wrap
Wrap the tuna and cheese in a tortilla and warm on the grill for a handheld version. Perfect for on-the-go meals.
6. Storage Instructions
Keeping Ingredients Fresh
- Canned tuna lasts for years in your storage space
- Shelf-stable cheese slices don’t require refrigerator storage until opened
- Mayonnaise in squeeze packets or shelf-stable jars lasts for months
- Bread stays fresh in an airtight container
Leftover Management
- This recipe is best eaten fresh – the bread can become soggy if stored
- Leftover tuna mixture can be stored in the RV refrigerator for 2-3 days
- Use leftover tuna mixture for crackers, wraps, or another sandwich
7. FAQ Section
Q: Can I make this tuna melt on a gas grill?
A: Absolutely! Gas grills are perfect for toasting sandwiches. Preheat to low heat and place the sandwich directly on the grates. The steady temperature of a gas grill ensures even toasting and perfectly melted cheese. The smoky flavor adds wonderful depth.
Q: Can I make this without a refrigerator?
A: Yes! All ingredients can be shelf-stable. Use canned tuna, shelf-stable cheese slices, and shelf-stable mayonnaise packets. Bread doesn’t need refrigerator storage. This makes it perfect for boondocking, dry camping, or any time you’re conserving fridge capacity.
Q: What’s the best bread for a tuna melt?
A: Sourdough, rustic Italian, or any thick, hearty bread works best. These hold up well to the filling without becoming too soggy. If using regular sandwich bread, toast it well first. This is a great way to use up bread before it goes stale.
Q: Is this meal budget-friendly?
A: Very much so! At around $1.00-$1.50 per serving, this is one of the most budget meals you can make. Canned tuna is an affordable protein, and bread and cheese are cheap staples. All ingredients are shelf-stable or have long shelf lives, saving fridge capacity.
Q: What other canned fish can I use?
A: Canned salmon, mackerel, or sardines all work beautifully. Canned salmon has a milder flavor similar to tuna. Sardines are more flavorful and oily – perfect if you enjoy a bolder taste.
Pantry-Only Meal Planning for Campers
This tuna melt sandwich is the ultimate pantry-only meal for camping trips. All ingredients can be shelf-stable, making it perfect for longer road trips where grocery shopping might be limited. It’s also a great emergency meal when you’re caught without fresh food.
Smart Shopping Strategies
- Keep canned tuna in your RV pantry – it’s an essential protein source
- Shelf-stable cheese slices are perfect for camping food
- Mayonnaise packets are lightweight and don’t require refrigerator storage
- Bread can be kept in the storage space or frozen for longer trips
Storage Space Optimization
Maximize your storage space by keeping tuna, cheese, and bread in a designated “quick meals” area. These items don’t need refrigerator storage, leaving precious fridge capacity for fresh items.
Propane and Fuel Usage
No-Cook Benefits
- This meal requires zero propane in its basic form – perfect for conserving fuel usage
- No need to check your propane gauge or worry about tank capacity
- Ideal for days when propane levels are low
- Great for boondocking when resources are limited
Optional Grilling Benefits
- If you choose to toast the sandwich, it only takes 4-5 minutes total
- The smoky flavor from a charcoal grill or gas grill adds incredible depth
- Minimal propane consumption if using a gas grill
Water Conservation Tips
Minimal Water Usage
- No water needed for cooking
- No pots or pans to wash if you eat the sandwich
- One plate and maybe a knife to clean
- Perfect for boondocking and dry camping where water conservation matters
Cleanup Strategy
- Wipe the plate with a paper towel – minimal water needed
- Use biodegradable wipes for quick cleanup
- A simple rinse with minimal water is all that’s required
Why This Recipe Is Perfect for RV Life
Pantry-Ready
All ingredients can be shelf-stable, meaning this meal is always available. No worries about fridge capacity or spoiled food.
No-Cook Convenience
No stove, no grill, no propane – just delicious food in minutes. The ultimate camp meal when you want something warm and satisfying without the fuss.
Protein-Packed
Canned tuna provides excellent protein to fuel your outdoor adventures. This meal keeps you satisfied and energized.
Budget-Friendly
Canned tuna and bread are among the cheapest camping food staples. This meal is incredibly easy on your food budget.
Quick and Easy
With just 5 minutes from start to finish, this meal is perfect when you’re hungry and impatient.
Great for Emergencies
Perfect when you’re low on supplies or don’t want to cook. A true emergency meal.
Creative Serving Ideas
Tuna Melt Bar
Set up a “tuna melt bar” with various toppings – hot sauce, pickles, mustard, and different cheeses. Everyone can customize their own sandwich.
Open-Faced Deluxe
Top open-faced sandwiches with extra cheese and broil on the grill for a crispy, bubbly topping.
Tuna Melt Dippers
Cut the sandwich into strips and serve with dipping sauces like ranch, hot sauce, or BBQ sauce.
Thermos Lunch
Pack the tuna mixture separately and bring bread to assemble fresh on the trail. The tuna mixture stays safe without refrigerator storage for several hours.
Essential Pantry Items
Keep These in Your RV Pantry for Quick Sandwiches:
- Canned tuna, salmon, or chicken
- Shelf-stable cheese slices
- Mayonnaise packets
- Relish or pickles
- Garlic powder and onion powder
- Hot sauce (optional)
- Bread (or tortillas for wraps)
With just these items, you can create a classic sandwich in minutes!
Final Thoughts
This RV pantry only canned tuna melt sandwich meal proves that camp meals can be warm, satisfying, and completely fuss-free. With just a few shelf-stable pantry staples, you can create a classic sandwich that tastes like a diner favorite – all without any cooking. Whether you’re conserving resources, avoiding grocery runs, or just want something quick and delicious, this recipe delivers on every level.
The beauty of this recipe lies in its simplicity and versatility. Use what you have, customize to your taste, and enjoy a satisfying camp meal without the hassle. Perfect for lazy days, busy travel days, or emergency meals, this tuna melt is a must-have in every RV kitchen repertoire.
Remember, great RV cooking isn’t about fancy ingredients or elaborate recipes – it’s about being creative with what you have and making every meal enjoyable. This tuna melt delivers on all fronts – it’s affordable, protein-packed, quick, and completely pantry-friendly.
Happy camping and even happier eating!
Hungry for more delicious RV recipes and camping food ideas? Subscribe to our newsletter for weekly meal planner tips, budget meals, and camp cooking inspiration that will make your road trip dining unforgettable.